
Do you remember a movie you watched once and appreciated the smooth and clear focus changes? Do you know the ones where the background gets all unfocused as the focus of the shot changes to the next focus? What if I told you you could get that same magical and cinematic look straight from your iPhone?
Let me introduce you to Cinematic Mode, Apple’s new feature that can turn every anonymous iPhone user into a potential Spielberg. But here’s the burning question: Is it all it is hyped up to be? But what if your iPhone does not support this new cool feature?
Get ready to rumble, film-making wannabees and interested content creators! In the next article, we are going to plunge into the world of using iPhone for videography and, more specifically, we are to look at what Cinematic Mode is, what it can provide for your videos, and, of course, how you can get awesome results even if you don’t use this feature. Are you a movie director? Here comes your chance to show off. Let’s roll!
What is Cinematic Mode?
Cinematic Mode is a modern, high-tech video shooting option that some iPhone versions possess. This feature allows the users to make videos with a shallow field of view and automatically switch focus to resemble the professional cameras used in movie production. With Cinematic Mode, your iPhone camera can record videos with a shallow depth of field and add beautiful focus transitions for a cinema-grade look.
Relevance: If you love iPhone and videography, this is a huge plus—because it features Cinematic Mode, which brings professional video shooting right to your fingertips. It makes capturing scenes and recording spatial videos genuinely cinematic and easy.
What Does Cinematic Mode Do?
Functionality: Cinematic Mode works through sophisticated computational photo processing to achieve what we may describe as a depth of field. It also enables the focus to change from one subject to the other smoothly as the subjects move within the frame.
Impact: All these factors significantly improve the quality of the video, making the final view more exciting and professional. Cinematic Mode takes your videos to a new level, whether they are a family function, travel vlog, or creative output.
How to Use iPhone Cinematic Mode
To start using Cinematic Mode and learn how to make cinematic videos with iPhone, follow these steps:
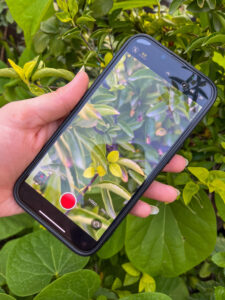
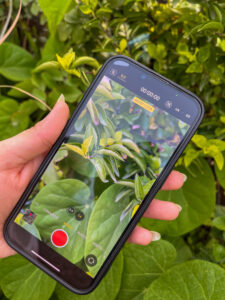
- Unlock the Camera app on the compatible iPhone you are using.
- The camera settings of the Rollercoaster can be found at the bottom of the screen; scroll through it until you see the option for “Cinematic.”
- Next, you will see the Cinematic Mode interface, almost identical to the video mode but with extra icons.
Editing Cinematic Mode Videos
Before recording, familiarize yourself with the various settings and controls:
Depth Control
- Press the Depth Control button, a small f with a number next to the button.
- The use of this slider bar controls the level of depth that is in focus. Here, moving the Zoom control to the left causes background blur, while moving the Zoom control to the right guarantees less blur.
Focal Length
- Press the Telephoto button once it reads “1x”, then press it again to change it to “3x”.
- Press again to switch to Wide.
Exposure and Flash
- Press the exposure button labeled by the sun and move the slider to change the video brightness.
- Push the flash button to switch through, turning it to Auto, On, or Off.
Recording in Cinematic Mode
Focusing Techniques
Cinematic Mode shines in its ability to create smooth, professional-looking focus transitions:
- Looking through the optical viewfinder, place the center of the selected subject matter over the magenta dot and tap it with the shutter-release button. The focus transition will also be smooth because of the camera.
- Press twice on a subject to turn the active Autofocus Point ON, which helps move subjects.
- Tap the screen once and hold your finger on the screen to mark the distance where the focus is to be locked.
Tips for Capturing Cinematic Footage
- Plan your shots: Consider how to apply the focus transitions to tell a story.
Want to take it further? Learn the 10 Cinematic Mode tricks Apple never shared — including hidden gestures, advanced blur control, and secret touch functions pros use. - Use subtle movements: In the case of the camera, there is no need to make jerky movements; slow and smooth movements add a cinematographic feel.
- Leverage depth: Move the subjects at dissimilar distances with the camera to give the layer of focal visual appeal.
- Be patient: Allow scenes to play out to achieve a realistic look and feel for a particular scene or character.
- Experiment with framing: Like prose writing, try different compositions to determine which is most effective for the text.
Editing Cinematic Mode Videos
Cinematic Mode also allows users to easily adjust focus and depth fields even after exiting the mode, and that is one of the most compelling reasons to suggest using it. This is possible because your iPhone carries focus information in real-time if you set the focus on the object you are recording.
Adjusting Depth of Field
To modify the depth of field in post-production:
- Locate the Cinematic Mode video you recorded by selecting the Photos app.
- Tap “Edit”.
- Click on the Depth Control button, the icon of which is f-stop.
- Please use the slider to set the depth level of the field. Alterations made will be for the whole video.
- To save the changes made, tap the option “Done.”
Modifying Focus Points
You can also change focus points after recording:
- In the edit interface, you’ll see a timeline with yellow dots indicating focus change points.
- Scrub through the video using the timeline.
- Tap on different subjects to change the focus point.
- Double-tap a subject for automatic focus tracking.
- Touch and hold to lock focus at a specific distance.
To remove a focus transition, touch and hold the yellow dot until a delete button appears, then tap it.
Advanced Techniques and Tips
Lighting Considerations
You can also change focus points after recording:
- In the edit interface, if you look into the timeline, the yellow dots explain the region where the focus changes.
- Scroll down while using the timeline to scrub through the video.
- Place your finger on various regions to shift the active point of interest.
- Tap the subject twice quickly to lock focus, and focus will be closed on the selected topic.
- You must touch and hold the focus point to lock focus at a particular distance.
- To delete a focus transition, press the yellow dot with your finger, wait until the cross appears, and tap on it.
Composition Strategies
Enhance your cinematic videos with these composition techniques:
- Rule of thirds: Located critical subjects on the cross points of a tally of 3 x 3.
- Leading lines: An attention-directing person or object must be drawn using certain natural lines of the environment.
- Framing: When the items in the foreground are to be used, then this is the perfect way to frame your subject naturally.
- Symmetry: Capture beautiful combinations by arranging things on your screen because there is always beauty in symmetry.
- Negative space: It’s okay to use large areas of negative space to help lead the composition’s focus to your main subject.
Understanding the Technology
In Cinematic Mode, a function optimizes using the A15 Bionic Chip neural engine compared to third-party applications. This integration enables processing and focusing in real time and allows changes as the video progresses, making the resulting videos look more professional.
Another advantage of the iPhone’s ultrawide lenses is that they can see motion while recording; thus, they can track entry and exit in the frame or change focus when necessary to emphasize these motions.
Which iPhones Have Cinematic Mode?
Due to the different types of iPhones released in the market, as mentioned above, not all of the iPhones have a cinematic mode, and therefore, specifying the iPhones having the cinematic mode must be done carefully as follows:
Cinematic Mode is supported on multiple iPhone devices. It lets the user record a video with a shallow depth of field and beautiful focus transitions for a cinematic feel. Unfortunately, this feature was introduced in the latest iOS version, so it is advisable to update your iPhone to the latest iOS version.
Here is a list of iPhones that support Cinematic Mode:
- iPhone 17 Pro Max
- iPhone 17 Pro
- iPhone 17 Plus (if released)
- iPhone 17
- iPhone 16 Pro Max
- iPhone 16 Pro
- iPhone 16 Plus
- iPhone 16
- iPhone 15 Pro Max
- iPhone 15 Pro
- iPhone 15 Plus
- iPhone 15
- iPhone 14 Pro Max
- iPhone 14 Pro
- iPhone 14 Plus
- iPhone 14
- iPhone 13 Pro Max
- iPhone 13 Pro
- iPhone 13
- iPhone 13 Mini
What is the difference between Cinematic Mode and Regular Video Mode?
In this rapidly developing field of digital video, new technologies and features appear in the creation and transmission of moving images. Two well-known video recording methods that have attracted much attention are the typical normal video mode and the newer cinematic mode. It is essential for those new to videography and those who use this format more professionally since choosing the proper mode affects the product’s quality, style, and effectiveness. This article will ensure that it explores all the ways and elaborated aspects of one mode and the other, comparing it with different modes and explaining what makes it unique.
Regular Video Mode
Standard or regular video mode is the traditional way of recording movies, which was adopted when digital cameras for shooting videos emerged. This mode aims to offer real-time videos whereby the exposure is fixed to give a steady frame rate and a correct focus on the scene being recorded.
Expressed technically, the regular video mode often covers standard shoot rates of 24, 30, or 60 frames per second (fps). The focus is constant on the scene while being recorded unless modified, and the depth of field is again a function of the f-number and the focal length of the lenses used. The recorded outcome is usually high-definition, and every object within the scene is well-focused.
The most frequently used video mode in everyday life and work can be attributed to the regular video mode, which applies to home videos, as well as to news reporting and the non-fiction film industry. Therefore, it is perfect for action shots, concerts, stage performances, sports, and anything else that involves quick movement or when there is a need to focus on a couple of subjects.
Some of the benefits of running the schedule in regular video mode are its simplicity, compatibility with different devices and editing programs, and clarity when capturing many subjects in one shot. However, it needs more flexibility to achieve a more ‘cinematic’ or ‘artistic’ view; it cannot create a more complex depth of field and focus that can be done in the other modes.
Cinematic Mode
Cinematic mode is a novel concept introduced to embody film’s aesthetic in digital video recording technology. It is a part of consumer electronics. This mode aims to reproduce the appearance characteristics of old film cameras and offer focused tools to capture more beautiful and emotionally exciting scenes.
That is why targeting adjusted focus after the shooting and Friese with a shallow depth of field and focus on the subject in motion become the main Cinematic Mode parameters. Technically, Cinematic Mode is often based on computational photography and artificial intelligence that scans the scene in real-time, recognizes the subjects, and produces blur in the background, similar to the footage shot on the departments of the top cinematographic cameras.
Cinematic Mode is usually recorded at 24 or 30 fps, nearer to actual motion picture shooting. The shallow depth of field effect is made possible by software optimization and multiple camera lenses that allow developers to choose what sections of the photo must be blurred.
This model is perfect for developing artistic content for social platforms, short movies, and video clips. It enables people with no experience in filmmaking to obtain a closer look at a cinema production, even without the use of expensive cinema cameras or, in most cases, professional editing software.
At the same time, Cinematic Mode has the benefits of making the vision of a scene and its emotions more vivid, or, for example, changing focus and depth of field after the capture, and gives videos a more cinematic look, which can help increase the production value of a video. However, it also has its flaws: the subject may lose focus while background details may be blurry; it is not suitable for objects in motion; the actual or digital resolution should be higher, and the storage space and processing power should also be superior.
Critical Differences Between Cinematic Mode and Regular Video Mode
Otherwise, Cinematic Mode and Regular Video Mode are practically the same but differ in their looks, depth of field settings, focusing methods, post-processing options, and matter of files.
- Visual Aesthetics: Cinematic Mode records video that appears to have been shot on a film camera, with a less blurred background than the photo mode. It also gives the work great depth and very effectively leads the spectator’s attention to the focus – the central figure. In turn, Regular video mode implies that the sharpness of the details will be consistent throughout the frame, which may help shoot all the details of a scene but does not look as elaborate as Cinematic Mode.
- Depth of field: These are contrasted remarkably in terms of who can control the depth of field or the plane of focus. The main benefit of the Cinematic Mode is that it can use much less depth of field, even if the device in question has small sensors and lenses. This effect is commonly done using the so called computational photography methods. This provides that the depth of field in regular video mode is dependent on the physical properties of the lens and sensor, which usually means that devices with consumer-level cameras will have a much greater depth of field.
- Focusing Techniques: Cinematic Mode often uses intelligent subject tracking and the option for Subject racking, which is the act of focusing on a subject and an object in a scene at the same time while recording. Also, depending on the implementation, it is possible to adjust the focus after the video has been shot in Cinematic Mode. Standard video mode typically depends on auto-focusing or manual focus; indeed, no alterations are possible in the focus when using this mode.
- Post-Processing Capabilities: The videos recorded in Cinematic Mode are usually followed by additional parameters that extend the post-processing possibilities, mainly when focusing and creating depth-of-field effects. This means creative decisions can be made or altered after recording the first source. Regularly, the video mode has fewer post-processing capabilities encompassing color correction, stabilization, and basic trimming.
- File Formats and Compatibility: Cinematic Mode can also save depth data and focus info into specific formats and metadata, still, which can still influence compatibility with specific editing applications and playback devices. As for the Regular video mode, it commonly employs basic video formats that most applications and video editing software can easily read.
Equipment and Software Requirements
Cinematic Mode support is generally available in modern and more complex gadgets. Currently, it is mainly incorporated in high-end mobile phones, some mirrorless cameras, and some selected professional video cameras by 2026. Cinematic Mode is usually found in devices with more potent processors and distinguishing camera units of various lenses and sensors.
Applications for processing and further improving the videos shot with Cinematic Mode have also been developed using the extra data recorded in this mode. The tools for post-processing have recently received work that allows them to directly interact with the depth and focus information gathered in Cinematic Mode and edit with it.
On the other hand, the regular video mode is quite versatile and can be used on all devices, including simple portable phones and professional cameras. The need for software for editing regular video is also lower, as simple editors can be found in free and inexpensive offers.
Creative Applications
Storytelling through Cinematic Mode opens up new possibilities for visual narratives. The ability to guide the viewer’s attention through selective focus and depth of field can enhance emotional impact and create a more immersive viewing experience. This mode is particularly effective for character-driven scenes, product showcases, and artistic expressions where the separation of subject from background is crucial to the narrative.
While professional filmmakers have long had access to similar capabilities through high-end equipment, Cinematic Mode brings these tools to a broader audience. This democratization of cinematic techniques has led to a surge in high-quality, visually striking content across social media platforms and independent film productions.
Industry adoption of Cinematic Mode has been growing, with many content creators and marketers leveraging its capabilities to produce more engaging video content. However, it’s important to note that regular video mode still exists in many professional settings, particularly in news gathering, sports coverage, and situations where capturing clear, comprehensive footage is paramount.
Challenges and Limitations
Although Cinematic Mode has its drawbacks, One must master this mode because it isn’t as simple as pressing a button and getting the effect within the frame. Some cinematography knowledge is needed to achieve that.
The storage and processing load is generally higher for the videos captured in Cinematic Mode since more data is recorded and real-time processing is done. This can affect the battery of portable devices and take up more storage space, especially for raw videos.
Thus, the regular video mode, which is simpler and easier to apply, might sometimes be perceived as less creative or efficient. However, because it is simple and reliable, it is the favorite among many videographers, especially when the shooting is fast or unexpected.
Future Developments
Since technology is rapidly developing, there can be improvements and additions to Cinematic Mode’s features soon. Further advancements in the use of AI to analyze scenes, better low light performance, and possible fine-tuning of the so-called ‘depth and focus’ effects may follow.
Combining with other technologies like augmented reality (AR) and virtual reality (VR) creates a new form of storytelling. With the principles of Cinematic Mode, we could follow up with a 360-degree video that works to make focus changes in immersive scenes.
Consequent to its enforcement, it can have a wide-ranging effect on the film and video industry. When features like those presented in the Cinematic Mode are more frequent and developed, new approaches to development and narration will appear. This could give rise to new concepts in aesthetics and might even affect the shooting and making of traditional films.
Can I Use Cinematic Mode in low-light conditions?
In this world of smartphone videography, nothing has looked more promising for the iPhone than Apple’s Cinematic Mode. This feature was released with the iPhone 13 series to help users record videos with a blur in front and behind subjects, giving a cinematic feel. However, let any videographer explain that the lighting is critical to the quality of the shooting. This article will discuss the benefits and drawbacks of Cinematic Mode in a low-light environment for iPhones.
Understanding Cinematic Mode
Cinematic Mode is a video recording feature that uses computational photography to implement the shallow depth of field technique like in professional cameras with quality lenses. It can work with subjects in the frame, and users can switch on different focus points live or at any time.
This mode employs several cameras and deep learning algorithms available in the iPhone to determine the objects in the scene and also map the scene’s depth. It then applies a software-based blur on parts that should be blurred to copy the methods used in expensive cameras, referred to as bokeh.
Currently, Cinematic Mode is supported by the iPhone 13 series and subsequent generations, that is, the iPhone 14 series and the iPhone 15 series. One must understand that although this feature is excellent, it is not perfect and is somewhat lacking in complex lighting conditions.
Challenges of Low Light Videography
Low light videography presents several challenges, regardless of the camera or mode used:
- Noise and Graininess: As the light diminishes, all cameras, including smartphones, need to boost their ISO (sensitivity to light) to obtain a bright image. This usually leads to the appearance of noise or grain in the recorded videos and other related images.
- Loss of Detail: With less light, the cameras cannot capture details and impressiveness of objects, and pictures become slightly blurrier and sharper.
- Focus Issues: Some features, like autofocus systems on any camera, including the Cinematic Mode, are ineffective in low light conditions.
Using Cinematic Mode in Low Light
What is more, even though Cinematic Mode yields excellent results in brightly-lit scenes, the low-light performance of this feature is only sometimes impressive. Here are some considerations:
Optimal lighting conditions: The Cinematic Mode is ideal for moderately well-lit areas. Apple has yet to indicate the minimum light level required, but app users have complained of better results if there is enough light to discover the subjects.
Tips for low-light shooting:
- Use available light sources: Have your subjects’ faces near windows or lighted candles, torches, or any source lamp.
- Keep subjects well-lit: Make sure the main object is always the brightest in the scene. If a time-lapse, photography, or video is used.
- Minimize Movement: Low light in photography causes blur, whether the camera or the subject is moving.
- Use a Tripod: This can help mitigate the shakiness of the image due to low lights, especially when taking videos and photos.
Limitations and Potential Issues:
Though several general flatness indices can be possibly used in the depth effect issue, Considering each of them separately or its specific strand or fragment is beyond the scope of the present work, specific possible artifacts in the depth effect are:
- But will also lead to a slower performance because of the processing it has to go through.
- Improving the Footage Shot in Low Light Cinematic Mode
Enhancing Low Light Cinematic Mode Footage
To get the best results when using Cinematic Mode in low light, consider these techniques:
In-Camera Settings:
- Manually Adjust Exposure: Press and drag the exposure compensation up or down on the screen.
- To lock focus and exposure, double-tap or press halfway on your subject until the AE/AF Lock icon is displayed.
Post-Processing Techniques:
- In this approach, you must use the Photos app to alter the focus points after the recording.
- Apply noise reduction in third-party video editing apps
- Adjust contrast and color to enhance the mood of low-light scenes
Additional equipment recommendations:
- External LED Lights: Small, portable LED panels can improve lighting.
- Reflectors: Once used for the purpose of throwing available light on subjects.
- Stabilizers: There is no way to avoid shaking thoroughly in low light. However, gimbals or Steadicams can assist in that.
Alternatives to Cinematic Mode for Low Light
If Cinematic Mode isn’t producing satisfactory results in low light, consider these alternatives.
Standard video mode with manual controls:
- Next, with the naked eye, make sure to access the Camera app, and once there, swipe to the Video mode.
- Slide the arrow on the top of the screen to expand the control panel Further.
- This is why it is recommendable to switch off the auto-focus and adjust the lens focus, ISO, and other settings by hand, especially in low-light conditions.
Night Mode (for photos): Unfortunately, it is impossible to use the Night mode for videos, but it can take great low-light still photos for iPhone models that support this feature.
Third-party apps for low-light video: There are many applications today, like FiLMiC Pro and ProCam, which have features that can help in low light, such as manual controls. However, Cinematic Mode will be less effective than these in achieving a deep ‘depth of field.’
How can I improve my Video Recording Skills on the iPhone?
The role of videos in young people’s lives has heightened in the current society due to technological advancement. The iPhone, in particular, is one of the best gadgets for recording high-quality videos. However, this does not entail possessing a specific iPhone to be highly talented at shooting videos. This article will walk you through methods and strategies to help you improve your video recording on your iPhone.
Understanding Your iPhone’s Camera
Providing general information about the iPhone’s camera is essential before moving on to more sophisticated techniques. Recording videos can also be done through the Camera app, provided these features are embedded. Discover the essential but rich streaming qualities, including 720p-4K video resolutions and 24/30/60 fps frame rates.
The better you choose, the better your movie’s quality, though the more storage space the former will take. Moreover, the newer iPhone models also come with HDR Video support when shooting videos, and it’s a great feature that grants better dynamic range to videos.
Composition Techniques
The composition of a video is a crucial factor in creating a well aesthetically appealing video. The rule of thirds is another simple and significant concept in photography and video production. You should picture your frame as a 3×3 grid, and if you’re aligning essential elements, it’s best to place them on these lines or at their cross-sections. This way, one gets a more balanced and exciting composition of the elements in the piece of art.
Another is what is known as leading lines. Try to find the natural leads in the environment (roads, buildings, or landscape), drawing the viewer’s attention through the frame. At times, the objects within the foreground can help in framing your subject and, therefore, injecting depth into your shots.
Feel free to change the angles and the point of view chosen. One option is to use a low-angle shot, which makes the subjects look more extensive and powerful, while a high-angle shot gives a bird’ s-eye view of scenes. Just by switching sides of the camera, the tone and message of this video can be transformed.
Lighting
Lighting is the biggest determiner of the quality of your videos. If natural light is available, it’s generally excellent and flattering. ‘Golden hour’ is the one hour after sunrise and before sunset, and in conditions like this, the light is warm, soft, and perfect for outside shoots. The blue period, or the time just before the sun rises or after the sun sets, is more relaxed and less noticeable.
When shooting at home, ensure your subject has their back to a window for natural lighting. Do not backlight unless you wish to have a shadow-like appearance of the subject. If there is inadequate natural light, acquiring portable LED lights for smartphones is recommended.
Audio Quality
However, do not degrade the quality of audio, which is also an arm of visual communication. The microphone already incorporated into the iPhone is adequate but has drawbacks; the sound quality weakens considerably when the speaker is either in a noisy environment or out of reach. Especially for speech, try to use an external mic, which can be connected directly via lightning or Bluetooth.
When recording, be aware of the places and people around you since they can influence your recording. Select environments that are as quiet as possible, and when recording outside the house, it is good to use some wind protector. During post-production processes, there are different applications for eliminating background noise while augmenting the voice.
Stability and Movement
Hence, shaking considerably contributes to spoiling an otherwise beautiful video. Begin throttling the viewing of your iPhone video with two hands and your elbows to your sides. The small tripod was one of the best things that ever happened to me for static scene shooting. For the camera movements, it is a good idea to use a gimbal which employs motors to counterbalance the phone for smooth motion.
Subsequently, while transitioning to a new view, move the camera smoothly by panning it in the horizontal direction and tilting it vertically. Make sure that any two movements on a subject start from a static shot and end on a static shot to give the video a more professional look. If using a tracking shot (shooting a subject as it moves), try to stay at an appropriate distance from your subject and follow them slowly.
Editing on iPhone
There is also a basic in-house video editor in the iPhone that can enable users to crop, rotate or enhance the color and join short videos. Many third-party apps can be helpful for more advanced editing; they include iMovie, LumaFusion, or Adobe Premiere Rush.
Discover simple aspects such as cutting on the action and following a subject’s movement from one shot to another, establishing shots, and shooting length to achieve the desired tempo. Of course, good editing turns your raw material into a good story, so do not underestimate this step.
Advanced Tips and Tricks
After you gain confidence in basic moves, try out the unique options that are available in the application you are using. A post might show how a garden or room was changed over a few days or months with the help of a time-lapse video where hours of footage are condensed to seconds. Slow motion adds drama to fast-flow objects or brings out things people usually cannot see.
Practice and Experimentation
Like any form of communication, it is always advisable to hone these skills with videos; this can best be done through more practice and trial. Explain individual assignments for themselves, such as making a short film about the neighborhood or a day in the life video. These projects will enable you to use various techniques and identify your style.
Watch and attempt to identify tracings of professionals work and figure out how they were created. These aspects include composition, lighting, movement of the camera, and how the video is edited. There is much information from other cinematographers and filmmakers who write iPhone video tutorials and tips, so read them.
Sign up for groups and forums related to shooting videos with an iPhone. These forums are beneficial to post your work and get reviews and ideas from others. Take specific online courses that focus on iPhone specific videography so that you are acquiring formal knowledge and tips from the experts.
Is Cinematic Mode Available on Older iPhones?
Cinematic Mode is a new usability introduced in the iPhone 13 series launched in September 2021; it enables a user to record a video with a bokeh depth field and easily switch focus between subjects. This adds a professional touch at the end of the final videos and is close to the equivalent of having a Hollywood touch.
However, as mentioned before, Cinematic Mode is only available on newer iPhone models, specifically from iPhone 12. It’s currently limited to:
- iPhone 13 Series: iPhone 13, iPhone 13 Mini, iPhone 13 Pro, iPhone 13 Pro Max
- iPhone 14 Series: iPhone 14, iPhone 14 Plus, iPhone 14 Pro, iPhone 14 Pro Max
- iPhone 15 Series: iPhone 15, iPhone 15 Plus, iPhone 15 Pro, iPhone 15 Pro Max
- iPhone 16 Series: iPhone 16, iPhone 16 Plus, iPhone 16 Pro, iPhone 16 Pro Max
- iPhone 17 Series: iPhone 17, iPhone 17 Plus, iPhone 17 Pro, iPhone 17 Pro Max
This is because Cinematic Mode is hardware-intensive. This feature heavily depends on the A15 Bionic chip (or newer) and its Neural Engine for real-time scene analysis and applying the depth-of-field feature. The given point is a computational feature beyond the computational capacity of older iPhones.
How can I maximize my iPhone’s Video Capabilities Without Cinematic Mode?
Cinematic Mode is excellent, but there are other ways to make great videos with your iPhone. Here are some cinematic mode tips and techniques to help you maximize your device’s video capabilities:
Explore built-in Camera app features:
- Portrait Mode: While mainly a photo feature, you can also record short videos with Portrait mode for that blending background blur look.
- Time-Lapse and Slo-Mo: In general, these can be used to add variety and interest to videos.
- Grid Overlay: Turn on the grid that you can adjust in the camera settings to assist in adducing the rule of third proportions.
Shooting techniques for professional-looking videos:
- Stabilization: To avoid that, use both hands to hold your iPhone steady, or you can consider getting a small tripod or a gimbal.
- Lighting: Consider the opportunities for natural light to avoid including backlight in your picture.
- Framing: Always take more than one picture from an angle and at different views, to make it look appealing.
- Focus and Exposure: Place your finger on the subject to lock focus and lock exposure before shooting a video.
Editing tools in the Photos App:
- Trim and Crop: They crop their footage, meaning they remove unnecessary parts or framing during the reception of footage.
- Filters: Make use of the default filters to lift the spirits of the videos.
- Adjustments: Tweak values such as brightness, contrast, and saturation, among others, to enhance the general appearance.
If you understand these integrated features and methods, you can improve the quality of the recorded iPhone videos regardless of whether the Cinematic Mode is available.
Are there any third-party apps that offer similar effects to Cinematic Mode?
Although no third-party app can mimic Cinematic Mode with real-time processing, there are many comparable apps for iPhone videography with additional integrated features.
Here are three popular options:
FiLMiC Pro: The application is FiLMiC Pro, which is most suited to performing professional video recording along with many options and settings. While it doesn’t provide automatic focus shifting like Cinematic Mode, it does offer:
- Some attractions of the cameras include Manual focus control with focus peaking.
- Depth of Field simulation through what is called a “Lens.”
- Advanced color grading tools
- Compatibility with lenses and gimbals
Focos Live: Focos Live has always had functionality for changing the depth of field on pictures, but it also has video features that can somewhat parrot what Cinematic Mode can do.
- The ability to change the depth of field in real-time while shooting involves the moving live preview.
- Post-recording focus adjustment
- Different bokeh looks and filters.
- 3D lighting adjustments
ProCam 8: Another indisputable example of a feature-rich camera application is ProCam 8, which provides as many manual modes for photo and video shooting. While it doesn’t offer automatic focus transitions, it does provide: Though it fails to do auto Focus transitions, it delivers:
- Manual focus control with focus peaking
- Depth-of-field preview
- RAW video recording is available on some devices or other video shooting options.
- Advanced video editing tools
Although these apps are not Cinematic Mode apps themselves, they provide solid tools to shoot in the same cinematic manner with a pinch of effort and imagination.
However, it should also be noted that while these third-party applications can yield stunning results, they generally take even a beginning user longer to recognize than Apple’s easy-to-use Cinematic Mode. However, gaining better control over these apps helps you fine-tune your videos and make them more professional-looking.
Conclusion
Some newer iPhones come with Cinematic Mode, which is not compulsory for filming fabulous clips. That is why you can get a high-quality video on any iPhone model with built-in camera tools, proper settings, and iOS applications.
Understand that good videography does not depend on the tutor’s attributes but rather on creativity and the direction of the videography. Do not let the absence of Cinematic Mode get in the way. Instead, focus on:
- Practicing regularly
- Experimenting with different techniques
- How to begin to master the iPhone and some of its functions
Whether you are recording a video to post on your social media, commemorating a special event, or recording a business event, you can record great videos with your iPhone. With such continued evolution, it is clear that having advanced smartphone technology now means that in the future, even more incredible features will be implemented.
FAQs
What do you get with Cinematic Mode that you don’t with normal video mode?
- It also has Post-Capture HDR Enhancement and Cinematic Mode for depth of field and focus transition.
Are there situations where I am not able to use Cinematic Mode?
- Yes, but proper lighting will give you a better outcome.
Where are the videos shot in Cinematic Mode stored, and how can they be edited?
- When using professional editing software, you can also employ the Photos app to introduce focus points and add edits.
Is Cinematic Mode available on the older iPhones released before the iPhone 13 Series?
- However, Cinematic Mode is available in iPhone 13 and all subsequent iPhone models.
What else can I do with my iPhone for video that does not include Cinematic Mode?
- Use third-party applications and accessories to improve the quality of the videos.
What are third-party applications that have a similar feature to the Cinematic Mode?
- Yes, other professional apps, such as FiLMiC Pro, have additional features for video shooting.